Part 3 - Technique: The Local Golfers Lockdown Series
Technique is great to learn at home because the temptation of the ball is taken away. This means that we can focus completely on what our bodies are doing without worrying about where the ball is going.
In this blog we’ll go over 3 very simple yet effective drills that will benefit any golfer, regardless of how you usually swing the golf club.
Tour players are working on these basics on a very regular basis. Continue to work on these simple drills and if you can make them habit, we have no doubt your ball striking will improve out of sight.

Drill #1 - Mirror work (5 mins)
Tour pros such as Tiger Woods are famous for using their hotel room mirrors during downtime to improve technique. The first swing drill we’re looking at is working on your address position and posture. Grab a club and take your set up in front of a mirror. Start from front on, here there are a number of thing to check in your set up. Check that your weight is evenly distributed between both feet and that your hips are level (horizontal to the ground).
Next check, that your hands are set slightly in-front if the ball and your spine has a slight tilt away from the target. Spend sometime perfecting your front on set up then take your set up so the mirror is in the ‘down the line’ view. Here we’re checking that you’re back is nice and straight, not arching in the lower back or curved in the upper back.
Continue to move out and back into your correct set up position for 5mins.

Drill #2 - Wind ups (10 mins)
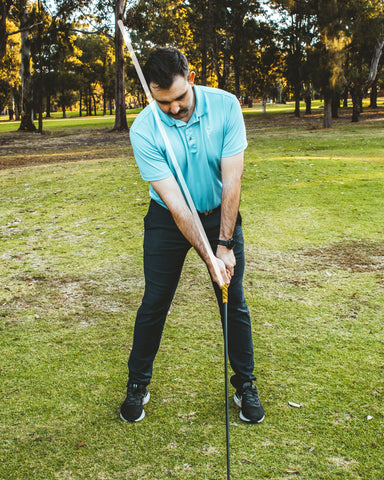
In the golf swing, shoulder turn is so important for both power and accuracy. So many amateur golfers under rotate in their swings causing a multitude of issues and compensations as a result. This drill focuses on your ability to turn throughout the swing. Grab a club and run it along the front for your chest, touching the front of each shoulder. Cross your arms and hold the club in place at each shoulder. Now get into your golf posture and you will notice the club is pointing in the direction of your shoulders. Start to wind up into your backswing and see if you can get the end of your club pointing at your right foot (for a right handed golfer). If you can this indicates you can achieve a full shoulder turn (90degrees). If not you’ve got some work to do!
Try as well turning to the left as well making the club point at your left foot. Practice both sides for 5mins each, focusing on turning with the core muscles and keeping the lower body as stable as possible. This will train your body to rotate more effectively in your swing, regardless of if you can produce a full turn or not. The closer you can get to 90 degrees, the better it will be for your swing. So continue to practice it! 
Drill #3 - Square up (5 mins)
The last drill for our technique session focuses on your club face control during the early parts of your swing. Grab a club and take your perfect set up from the ‘Mirror Work’ session.
First we are going to check your grip. Check that you are gripping the club in your fingers instead of your palms and that both v’s (created between thumb and forefinger) are pointing between your right ear and right shoulder. This will create a ‘neutral’ grip.
Now make your takeaway, stopping when your club gets to parallel to the ground. Here we are looking to see where the toe of the club head is pointing. We are looking for the toe of the club to almost be pointing straight up at the sky but not quite (about 80 degrees). If the face of your club is aimed at the ground it is too closed and if it is facing the sky it is too open. Set yourself in the correct position then start again, seeing if you can learn where a square club face is at the end of your takeaway. Do this drill for 5 mins.

And that's it! This is such an effective use of 20 minutes which will drastically improve your technique, and lower your scores over time. Doing these in slow motion is the real key.


